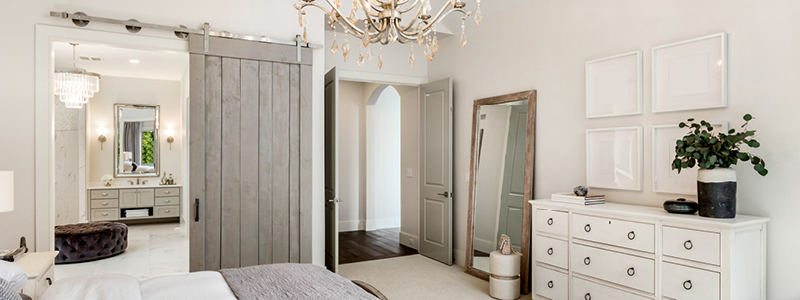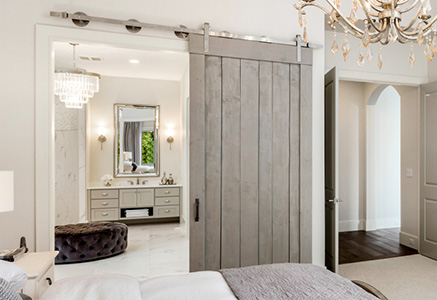
A sliding barn door can add charm and character to a room and is a great solution to free up space normally taken up by a door swing in a smaller room. While hanging a barn door may have been complicated in the past, the growing popularity has led to easier methods of installing them.
Things to think about
It’s not too hard to install a barn door yourself, but if you’re not comfortable doing it yourself we’d be happy to suggest a contractor who can do it for you.
A barn door works best when there’s enough room for it to slide unhindered. The section of wall that the barn door will cover when open should be free of pictures or decorations and have a few inches of clearance from furniture. And don’t forget about light switches, power outlets, or vents that may be covered when your door is open. You may be able to have them moved so that they’re always available whether your door is closed or not.
When sizing your door, you’ll want something that’s a little bit larger than the entry that it will be covering. You’ll also want about half an inch of clearance at the bottom when the door is hung. That way it won’t pop out of any guides when you open and close it.
Safety first! Barn doors can be heavy and awkward to move on your own. Work with someone to team lift heavy pieces and when working on a ladder.
Make sure you have everything you need
Having all of your tools in one place will make the project go faster. Here’s what you’ll need to hang your barn door:
| Pencil | Drill with countersink bit | Stud finder |
| Level | Step ladder | Time to make a stud finder joke |
| A friend to help lift the door | Tape measure | Square |
| Clamps | Wood filler | Paint and paint brush |
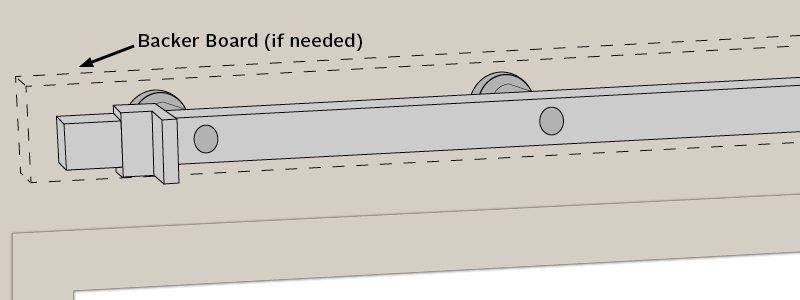
Step 1: Install the backer board
You’ll need about an inch of clearance between the door and the wall. If the track for the door doesn’t give you that much clearance on its own, you’ll need a backer board for the track.
A backer board is a sturdy block of wood on which the track and door will hang. It’s an important piece to support the door if you’re installing your door on drywall. It offers additional support for hanging the door without having to add blocking inside of the wall. A piece of 1×4 should be sufficient, and it should be the same length as your track. You can paint it the same color as your wall, and we can match that color for you!
Find the wall studs with the stud finder. (Now is when you’ll want to use the time to make a stud finder joke, too.) The first stud should be on the hinge side of your door. Mark the studs on the wall then hold your backer board level against the wall and transfer the marks to the backer board.
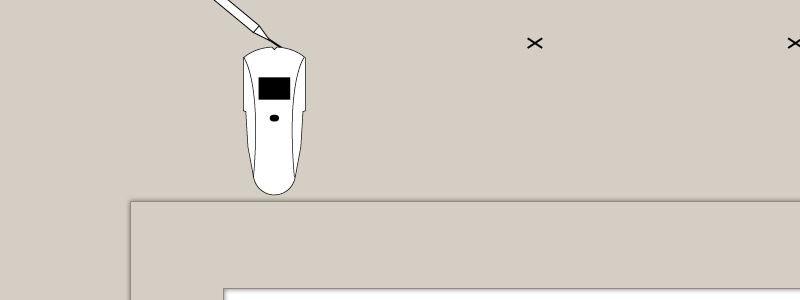
You can now pre-drill the holes for the hanging hardware in the backer board.
Clamp the track to your backer board, and use the pencil to mark the positions where you’ll fasten the track to the backer board, then remove the track from the backer board. Drill starter holes in the backer board to make hanging the track easier.
A starter hole (or a pilot hole) is a small hole drilled in material to guide the screws along a path and make it easier for screw threats to cut through the material without breaking the screw.
Now that you have holes for the hanging hardware and pilot holes for the track hardware in your backer board, you can hang it. A friend can be helpful when hanging the backer board. Use wood screws to go through the backer board and into the wall studs. Because you used a countersink bit for the holes, the screw heads should now be below the surface of the board and you can fill the whole with the wood filler and paint over the filled holes so you can’t see them.
Step 2: Install the door track
This is where the starter holes will be very helpful. Since you’ll be working on a ladder or over your head, the starter holes will make this step easier. Line the track up with the holes you drilled in the backer board and attach the track with the hardware provided. You’ll also want to install the stoppers that came with the track now so that your door won’t roll off the track.
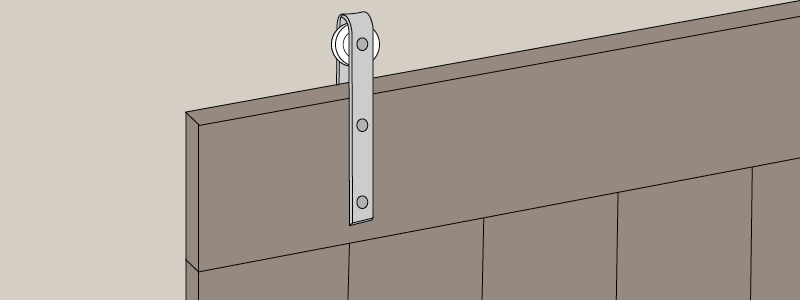
Step 3: Prepare the barn door
Whether you purchased a kit or purchasing the door and the hardware separately, you’ll want to attach all of the hardware before you try to hang your door.
If your barn door came as kit, it will likely be pre-drilled for its hardware. If not, you’ll need to determine where to hang the hardware so that the door has a half-inch gap between the bottom of the door and the floor. Mark the door where the holes in the hardware are, and predrill the holes for the hardware, then attach it. Your square will be useful here to make sure the hanging hardware is installed correctly.
Don’t forget to attach the door handle before you hang the door!
Step 4: Hang the barn door
Do you still have the friend from the parts list? Now’s the time to use them! Team lift the door and place the wheels on the door track. Slide it back and forth and test the stoppers that you installed. Great, you’re almost done!
Install the anti-jump disks that keep the door from popping off of its track if someone pushes or pulls too much on the door when opening it.
Wait for the door to stop moving on its own after installing the anti-jump disks. The door should hang plumb. Place the door guides on the floor and mark the screw holes on the floor. Drill a pilot hole for the screws and attach the door guides. Double check the door stoppers are tight, the anti-jump disks are in place, and that the door opens and closes smoothly.

Step 5: Keeping your barn door in working order
The easiest way to make sure your barn door lasts for years to come is to follow the manufacturer instructions for cleaning. Over time, accumulated dust can work its way into the rollers and bearings of the door, making them harder to operate. Routinely cleaning the hardware and track with a soft cloth and mild cleanser can help your door last as long as you own your home. Don’t forget to occasionally check that fasteners on the door aren’t coming loose.